
Like many people, I didn’t anticipate needing a fully functional home office at the start of 2020, but after spending the first three months of quarantine squeezed under a cheap desk in our cramped guest bedroom (which also housed a twin size bed frame), I was ready for a change, and that’s when I knew it was finally time to get my own Queen Loft Bed.
The incredible impact that the loft bed had on the space was immediately obvious. Not only did it totally open up and transform the room to be altogether more useful and comfortable; it also provided me with a larger and sturdier desk and a bigger bed for guests.
There was just one problem…

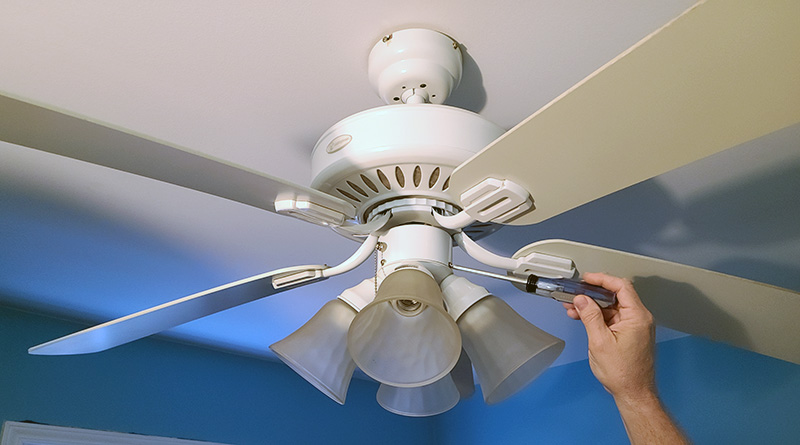
Because we hastily made the decision to get the Adult Loft Bed, we didn’t consider the hanging lighting fixture/ceiling fan that was already installed in the room and how it might affect the loft bed experience. But as you can see from the photo above, it wasn’t great. Once you were up in the bed, you could sit or lay comfortably without the fan getting in the way, but getting in and out of bed was tricky, and it was dangerously impossible to do if the fan was running.
Luckily, I knew a guy. My father-in-law just happened to be a highly experienced electrician enjoying retirement, meaning he had the exact knowledge we needed and some spare time to share it with us, so we enlisted him to come help us remove the fan and install a new lighting fixture to make it easier and safer to access the loft bed.
If you’re interested in an Adult Loft Bed for your space, but worried about an existing fixture that may be dangling in the way, continue reading for a step-by-step break down of how we replaced an intrusive ceiling fan with a sleek and slender LED light.
Step 1: Remove the Light Kit
Our first step was to remove the light kit. This is the lower portion of the fixture that includes the place to screw in the lightbulbs. We used a basic Phillips-head screwdriver (for this and all other screw-related aspects of this project).

Step 2: Detach from Base Plate
Once the light kit was removed, it was time to detach the rest of the fixture, which meant unscrewing the base from the base plate attached to the ceiling.

Step 3: Remove Base Plate
No surprise, here: The next part of the process was to remove the base plate. This required both unscrewing the plate from the ceiling and detaching the wires plugged into the base plate that powered the fixture. But wait…what is that?


REMINDER: Observe and Test Wires Before Disconnecting
As we prepared to remove the wiring from the base plate, my father-in-law noticed that there were actually two live wires going into the fixture. One black wire attached to an orange wire in our condo’s electrical system, and one blue wire attached to a yellow wire. We used his Tic Tracer voltage testing tool to confirm this.
It turns out that the fixture was actually set up so that power could go directly to the fan part. This allows us to run the fan at night without having the light on, even though the room has just a single light switch.
All of this is to say that it’s important to always check your wiring before detaching or attaching any wires, especially live wires connected to a power source.


Step 4: (Carefully) Detach Wiring from the Base Plate
Once we identified the live wires and the neutral wire, we carefully removed them from the base plate. The base plate (the only remaining element of the original light fixture) is now completely removed.

Step 5: Cap Unused Wires
Because we had a somewhat uncommon wiring situation, our next step was to identify which wire we needed to affix to the new light (i.e., which wire was powering the light in the original fixture). In this case, it was the yellow wire. Then we used the plastic twist-on wire connectors and some electrical tape (luckily, my father-in-law brought both) to cap the remaining live wire and neutral wires. Once they were capped, we returned them into the hole in the ceiling to get them out of the way.


Step 6: Attach the Mounting Bracket for the New Fixture
At this point, there is only one live wire (the yellow one) and one neutral wire hanging out of the hole in the ceiling.

We’re ready to start putting up the new light. Obviously this process is different for everyone depending on what kind of fixture they’re installing. Since our goal was to save space above the loft bed, we went with a flush mount LED light, specifically the 13 inch 360-Watt Equivalent Oil-Rubbed Bronze Integrated LED Flush Mount with Frosted Shade Glass from Hampton Bay.
For us, the next step was to attach the mounting strap and the included threaded nipple (their term, not mine) to the wall over the opening where the wires are located. To do this, we simply reused the screws that were used to hold up the original fixture.
NOTE: The bracket is actually installed incorrectly (upside down) in the photo below. We of course corrected it immediately, but forgot to take a new photo.

Step 7: Connect the Live Wire to the Light
Once the mounting strap was attached to the ceiling, we connected the light to the condo’s wiring. The black wire on the fixture connected to the yellow live wire, and the white wire on the light connected to the white neutral wire in the ceiling. The remaining (uncovered) grounding wire on the light was left alone, as it wasn’t needed for this particular application.

Step 8: Affix the Light to the Bracket
Once the wires were connected, we attached the base of the light fixture (i.e., the “canopy”) to the mounting strap by screwing it into the nipple.

Step 9: Secure the Shade
The last step for us was to simply secure the frosted glass shade to the base of the fixture by threading it into the divots located inside the canopy.

Tah-dah! Despite an unexpected twist in the way the original wiring was arranged, we had a pretty easy time removing the old fixture and installing the new light. However, it’s important to reiterate that this experience is not universal and the specifics of your project will obviously depend upon the fixtures that you are using and how your home’s wiring is set up.
Please be sure to always carefully and completely read the included instructions and take the proper safety precautions before undertaking this type of project on your own.
If you’re interested in doing this in your space, but are concerned about losing the cooling capabilities of a ceiling fan, we found a workaround by spending $10 on a small desk fan (the Personal Rechargeable Fan from Holmes), which does not have to be plugged in, so it can be used on the attached desk or easily up to the bookshelf on the loft to keep us cool while we’re working or sleeping the room.
